|
Keyframes
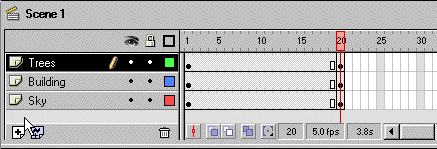
Keyframes are used to specify changes in the animation. At the
current time, each layer in your movie is only one frame long. You
want your movie to last 20 frames. Inserting a key-frame at Frame
20 will cause each layer to remain on the screen until Frame 20.
Extend the Sky Layer
- Click in Frame 20 of the Sky layer.
- Choose Insert > Keyframe from the menu.
Extend the Buildings Layer
- Click in Frame 20 of the Building layer.
- Choose Insert > Keyframe from the menu.
Extend the Trees Layer
- Click in Frame 20 of the Trees layer.
- Choose Insert > Keyframe from the menu.

Create a Layer Named Car
Create a new layer. Name the layer Car.
- Make the Trees layer the active layer by clicking on the Trees
layer name.
- Choose Insert > Layer from the menu to create a new
layer above the Trees layer.
- Choose Modify > Layer from the menu.
- Type Car in the Name field.
- Click on OK.
Add the Car to the Stage
- Click in the first frame of the Car layer.
- Move to the Library panel.
- Click on the icon next to the car and drag the car onto the
stage.
- Select the Arrow tool.
- Click on the Scale modifier. Handles will appear around the
car.
- Drag the handles until the car is the appropriate size.
Motion Tween
Make the Car Move
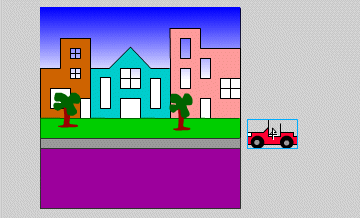
- Place the car to the left of the Stage as shown here.

- Click in Frame 20 of the Car layer.
- Choose Insert > Keyframe from the menu.
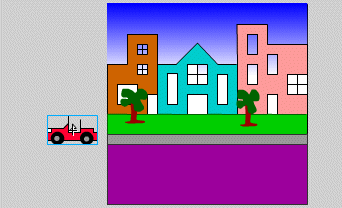
- Click in Frame 1 of the Car layer.
- Move the car to the right of the Stage as shown here.

- Make sure Frame 1 is still selected.
- Choose Insert > Create Motion Tween from the menu.
- Choose Control > Rewind from the menu to rewind the
movie.
- Choose Control > Play from the menu to play the movie.
Your car should move across the Stage.
Adding Sound
To have a horn honk as the car rolls through town, you need to
add sound.
Import the Sound
- Click here to download the horn sound.
Open the Zip file and place the shorthrn.wav in a folder.
- Choose File > Import from the menu. Find and
select shorthrn.wav and click on Open. The file shorthrm.wav will
appear in the Library.
Add the Sound
- Click on the Car layer name to make the Car layer the active
layer.
- Choose Insert > Layer from the menu to create a new
layer. The new layer should appear at the top of the stack as
the active layer.
- Choose Modify >Layer from the menu and type Horn in
the Name field to name the layer Horn.
- Click in Frame 10 on the Horn layer.
- Choose Insert > Keyframe from the menu to make Frame
10 a keyframe.
- Right-click in Frame 10 and choose Panels > Sound
from the context menu. The Sound panel should appear.
- Choose shorthrn.wav from the drop-down menu in the Sound field.
- Choose Event from the drop-down menu in the Sync field.
Play the Movie
- Choose Control > Test Movie from the menu to play
the movie.
Stopping the Action
If you published your movie now, the car would start moving as
soon as the viewer entered the screen. You want the viewer to click
on a button to make the car move. In this exercise you will add
some script to stop any action before the viewer clicks a button.
Later, you will add a button for the viewer to click on to start
the action.
Stop the Action
To stop the action:
- Choose Insert > Layer from the menu to add a new layer.
- Choose Modify > Layer from the menu and type Stop
Action in the Name field.
- Click on OK.
- Select frame 1 on the Stop Action layer.
- Right-click in Frame 1and choose Actions from the context menu.
- Click on the plus (+) icon a context menu will appear.
- Choose Basic Actions > Stop from the menu.
Play the Movie
- Choose Control > Test Movie from the menu to play
the movie. Your car should not move.
Adding a Button
Buttons have four states: up, over, down, and hit.

|
The Four Button States
|
|
Up
|
The appearance of the button when the pointer is not over
it.
|
|
Over
|
The appearance of the button when you place the pointer over
it.
|
|
Down
|
The appearance of the button when you click on it.
|
|
Hit
|
Defines the area that will respond to a click of the mouse.
|
Create a New Layer
- Click on the top layer to make the top layer the active layer.
- Choose Insert > Layer from the menu to create a new
layer.
- Choose Modify > Layer from the menu.
- Type Button in the Name field to name the layer button.
- Click on OK.
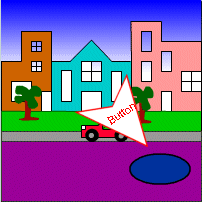
Take the Start Button from the Library
- Move to the Library. If the Library panel is not open, choose
Window > Library from the menu.
- Click on the icon next to Start Button and drag the Start Button
onto the Stage.
Edit the Symbol
- Choose Edit > Edit Symbols from the menu to change
to the Edit Symbols mode.
The Over Frame
- Click in the Over Frame to select it.
- Choose Insert > Keyframe from the menu.
- Click on the Fill color box and select green.
The Down Frame
- Click in the Down Frame to select it.
- Choose Insert > Keyframe from the menu.
- Click on the Fill color box and select brown.
The Hit Frame
- Click in the Hit Frame to select it.
- Choose Insert > Keyframe from the menu.
- Choose Edit > Edit Movie from the menu.
- Right-click on the button.
- Choose Actions from the menu
- Click on the Plus icon. A context menu will appear.
- Choose Basic Actions > Go To from the menu.
- Make sure Go To and Play is selected.
Test the Movie
- Choose Control > Test Movie from the menu. The Test
Movie window will open.
- Click on the Start Button to make the car roll.
- Close the window.
The Text Tool
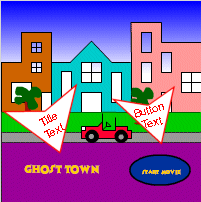
You need to put a label on the Start Button and add a title to
the movie. You will use the Text tool for this.

Add Text to the Button
- Click on the Text tool to select it.

- Choose Text > Font from the menu and select a font.
I used Jazz Poster ICG.
- Choose Text > Size > 12 from the menu to set the
font size to 12.
- Click on the Fill color box and select gold as the color.
- Type Start Movie on the button.
- Click anywhere outside the Stage to close the text box.
- Use the Arrow tool to adjust the placement of the text.
- Click anywhere outside the Stage to deselect the text box.
Add a Title
- Choose Text > Size > 24 from the menu.
- Select the Text tool.
- Click on the lower left corner of the Stage.
- Type Ghost Town.
- Click anywhere outside the Stage.
Test the Movie
- Choose Control > Test Movie from the menu. The Test
Movie window will open.
- Click on the Start Movie button. The movie should play.
|
