|
The Pencil Tool
You use the Pencil tool to draw freehand shapes. You need to draw
a tree trunk and a treetop to create a tree.
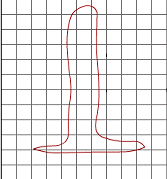
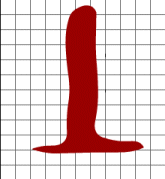
Create the Tree Trunk
- Choose View > Grid from the menu. Deselect Snap to
Grid.
- Select the Pencil tool.

- Click on the Stroke color box and select brown as the stroke
color.
- Click on the Fill color box and select brown as the fill color.
- On the Modifier panel, select the Smooth option. This option
rounds the corners of your drawing.
- Draw the tree trunk.
- Select the Paint Bucket tool. You use the Paint Bucket tool
to fill enclosed areas with color.
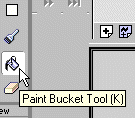
- Click inside the trunk to fill the trunk with color.
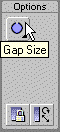
Note: If your tree trunk does not fill with color, you might
have gaps. To close the gaps, click on the Gap Size modifier and
choose Close Large Gaps.
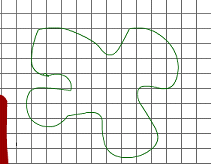
Create the Tree Top
- Select the Pencil tool.
- Click on the Stroke color box and select green as the stroke
color.
- Click on the Fill color box and select green as the fill color.
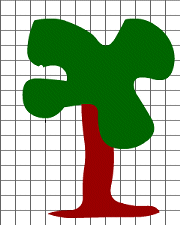
- Draw a treetop like the one shown here.
- Select the Paint Bucket tool.
- Click inside the treetop to fill the treetop with color.

Create the Tree
- Select the Arrow tool.
- Double-click on the treetop.
- Drag the treetop over the tree trunk.
Grouping
Flash 5 views the tree as two objects, the treetop and the tree
trunk. In the next exercise you will group the treetop and the tree
trunk to cause Flash 5 to view the tree as a single object. Then
you will turn the tree into a symbol.
- Select the Arrow tool.
- Use the Arrow tool to create a rectangle around the tree. This
selects the tree.
- Choose Modify > Group from the menu to make the treetop
and the tree trunk a single object.
- Choose Insert > Convert to Symbol from the menu. The
Symbol Properties box will open.
- Type Tree in the Name field.
- Select Graphic as the Behavior type.
- Click on OK. The tree should appear in the Library.
- Press the Delete key to remove the tree from the Stage.
|